03 January 2016

New Bathroom - Simla


Here is video of my new bathroom.  Below are pictures and explanations.


Here it is.  I have been working since 2014 to get this new bathroom in my house.  I started working on it every night and almost every weekend since Sept. 2015 until now (03 Jan 2016).  It was just an ugly little non-functioning room in the back corner of my house where the old stairs used to be.  Now it is the most attractive feature in my house.


This ugly little porch is where you used to enter and exit the house before I put in the new bathroom.  Now it can be torn down.


In 2014 I put a new exterior door in the house knowing that some day I would put a new bathroom where the old door was. I built these wood steps this fall because this is one of the principal entrances to the house now.


I installed a new window because I knew that I wanted an operable window in the shower to let condensation out.


This is the new window from inside the shower.


I wanted soap dishes in my shower so now I have plenty of them.  I had dead space behind the shower since the room is wider than the shower pan so I capitalized on the extra space and framed soap shelves into the shower.  I had never tiled a shower before; only a few floors.


I had to frame the shower exactly to fit the shower door.  It was a very tight fit- almost too tight.  It was hard to know exact thicknesses of plywood, backer board, thin-set, and tile.  It is a good thing I leveled my shower pan in a bed of mortar or else the door would have never fit right.  The opening above is to let condensation out of the shower.


I wanted plenty of light in the shower so I put a recessed light up in the ceiling and tiled around it.  I won't get a moldy ceiling now with the shower completely tiled, the condesation escape opening, the new window, and the new exhaust fan I put in.


This job was a huge electrical endeavor for me.  I really only knew how to hook up outlets, lights, and ceiling fans before.  I had to add a new circuit for this bathroom with GFCI outlets for the bathroom.  I had to get into my electrical panel to hook up the new circuit on a tandem breaker.  I have been reading a lot about electrical work since I moved into the house.  I know one day I will have to move the panel.  For right now it is still in the bathroom.  I left plenty of extra wire on my home-run so when I move the panel I won't have to splice in a junction box or anything like that.


As with the electrical, I had never done so much rough-in plumbing before either.  I have also been reading quite a bit about drain systems and water lines since we moved into the house.  I have made many trips to the plumbing supply store over the past few months.  Those shark bite fittings I used are expensive but I love their quality and versatility.


When I was building this new window well last spring (2015) I also excavated for the new sewer line in order to tie my bathroom drain system in.  I excavated it all by hand.


I had to frame in a new pocket door since I wasn't going to have the door swinging in to my kitchen or swinging in to the bathroom.


I spent a lot of money on nice fixtures and I took my sweet time reading and following all the directions.  The experience I gained from this bathroom in monumental.  Now I am confident that I can build a brand new house and do EVERYTHING my self - If I feel like it.


27 July 2015

Barn Remodel

In the center of the photo, between the windbreak and the house, you see the barn I have been working on remodeling all summer.  It is in a beautiful, isolated spot smack- dab in the middle of acres, and acres of wheat fields out here in Eastern Colorado.


 This is the before shot.  It was used to store grain in the old days.  They would pile grain in there with tractors and store it.  All the pressure of the grain and tractors hauling it in and out would push the exterior walls out over time.  Additionally, the raters were not adequately braced at mid-span so the roof was sagging.  These old doors on each low side of the barn were the only way in and out.  It was a mice paradise in there when they used to store grain inside.  Yes, we cleaned out all the dead mice and mice feces in the wall cavities before putting new metal siding on.  Now it doesn't reek inside anymore. 

 We, (the owner and I) did a lot of interior framing to shore up the sagging roof and pull the exterior walls back in line.  Above these interior walls is a ceiling/floor that keeps the exterior walls from pushing out again.  There are 4 shear walls tied in to each exterior wall on each side of the barn now.  There are 4 rooms 8' x 8' on each side for storage or craft use.  The middle is an enormous corridor which will accommodate the owner's 13' tall camp trailer; hence the 14' tall custom made door by your's truly.  

 I hope this picture is proof that we got the sag out of the roof.  This shot before I fixed the rafters looked like a ski jump.

 Here is the back side of the barn.  Those are 20' panels on the roof.  It was a big job for only 2 guys.  


This is how I got the ridge cap on.  The roof is a 7.5/12 with new metal roofing.  It is too slick to stand on so I  had to put up roof jacks and planks all along the peak.  I put a 33' extension ladder in the bed of my truck along the slope of the roof.  This way I had access up to my plank line.  I used the safety rope and body harness to tie my body off to the roof when putting up the roof jacks.  It took all day but the ridge cap is on and I didn't get hurt.  The ladder wouldn't not have been very stable on the ground.

Here is a picture of Your's Truly putting on new fascia all the way around the existing roof.  There wasn't any existing fascia at the eaves.  The fascia at the rake was rotten and falling off the roof.  That is the old tin you are looking at up there before we got it all off.  F. Y. I.:  That old tin comes off well if you get under it with a long (7') bar and roll it up like carpet.   Also notice from this picture that I framed in and installed new windows and a new man door.  

Well, putting on that new fascia really made this old, ugly, pig-of-a-barn into an attractive lady dressed to kill; in red.

We framed this opening for a new 10' x 10' overhead door.  The door has just been ordered and hasn't arrived at the job site yet.  I'll have to go back later and put this 10' door on.
There was no way to get a 14' tall over-head door on this opening because such a tall door would have required more room above it than we had in order to accommodate the track; so I said, "I'll make a door".

 And that I did.  We didn't have enough full pieces of red panels left so we came up with a sharp little design for the double in-swing doors we made.  We incorporated the panel laps into our design.

Just to give you an idea of how tall these doors are, I had the owner pose next to them.  Both he and I are under 6' tall so you can imagine how we 2 dwarfs got these monster doors built and installed; we had his wife help us tilt them up - of course!  

The doors open really nice.  I have each of them on 5 gate hinges and spring loaded rollers as seen in one of the interior photos above so they skate right across the uneven concrete floor and open quite nicely.  Now this edifice is no longer a barn; it is a classy garage suitable to house a 13' tall camper trailer.

We got the over head door on the other end.  It is a 10' x 10' door.  We had to get a special track assembly so the overhead tracks wouldn't hit the trailer when it was pulled all the way into the garage.  The instructions that came with the door were poorly written so it took us 2 days to figure out how all the parts went.  The door opens and closes fine now.   Now I know how to install garage doors.


12 July 2015

Pergola


I am building a Pergola.  The lumber has already been ordered and stored in the client's garage.  The Pergola is going way in the back yard hundreds of feet away from where the lumber has been stored.  I built the roof of the pergola on my truck bed and drove down to where I have been digging post holes. I pushed it off one side of the bed and propped it up with a sheet of plywood while I drove the pickup away.  I almost got mouse trapped, but I lived to frame another day.
I put 2 x 2's across the 2 x 6 joists to keep them straight.  Then we flipped the top over and bolted on the posts.  Now the Pergola is like a giant table.  We made sure the legs were square both ways with the top.  We dragged the pergola back a few feet and flipped it over.  The heavy posts made it easy to flip over.  It went right down into to the holes as planned and nobody got hurt.  It took 6 of us to get it up.  Then we went around and leveled the posts.  Now we are ready to dump concrete in the post holes.
I got it leveled and poured the concrete in the holes.  I had to take my paint sprayer apart because it wasn't keeping pressure.
Nice prairie skyline
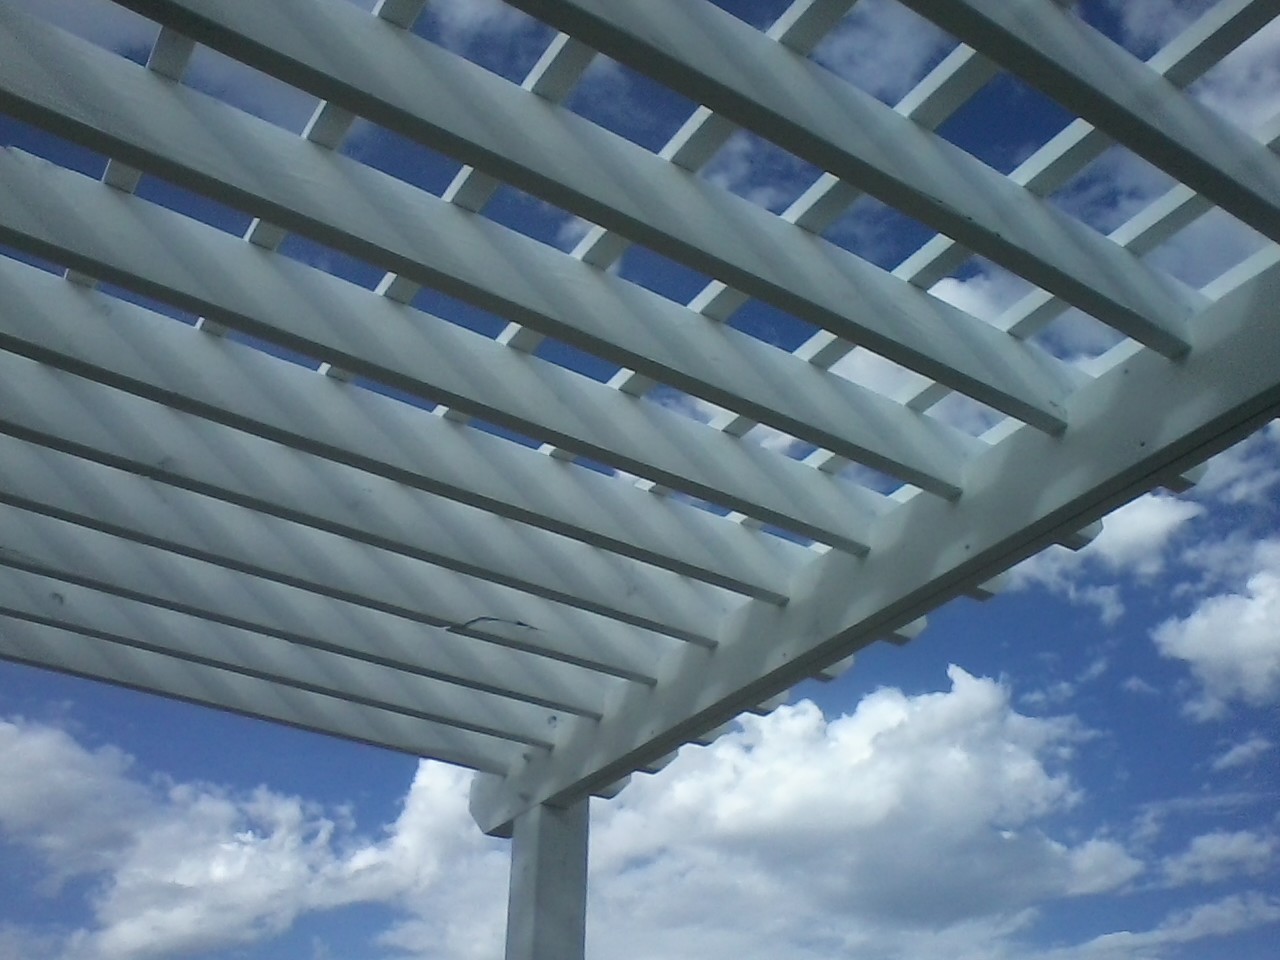
This is what the underneath side looks like.

09 July 2015

Porch Extension

The house here had hail damage on the roof.  My  neighbor was hired to replace the existing asphalt shingle roof with a metal roof.  He hired me to extend the roof and make a porch.  Before I started there was just a gable over the doorway.  I made the trusses because the porch had to be done in 3 days so they could put their new metal roof over it.  I couldn't wait on somebody else to make the trusses so I did it.
I took my sweet time framing the porch because they are leaving all the framing exposed.  It was a nice little roof.  Everything planes fine, the porch is square, the posts are plumb, and the beams are level.

23 June 2015

Sewer line replacement

I have been wanting to rip out my main sewer line since we moved into the house.  I had a bad feeling about it.  I started excavating it back in February.  When I dug it up it was all pieced in and crooked and ugly.  This shit nest was all up and down the old cast iron.  I don't know how the waste was getting through.  There was cast iron which the trees had gotten into, PVC, which someone had pieced in years ago, and clay.  I put in new ABS as far back as my excavation went.
This is what the old sewer line looked like before I poured the window well.  Notice that stupid concrete patch job under the blue ladder.  Somewhere by the bucket of screws you can see where the cast iron line was flaking away.  I put duct tape over it until I could rip it out and replace it later.

 This shows the connection I made at my existing clay sewer line.  The branch off to the right is for my new bathroom.  I couldn't replace the sewer line until I formed and poured the window well.  The object of this project was to dig up the sewer line and make a window well all in one excavation.  I excavated it all by hand.
I sloped my line 1/4" per foot.  I drove those wood stakes in to keep the line straight until I get it back-filled.  I will have to extend my clean-out above grade but I ran out of 4" ABS.  The clean out is moved enough away from the house because I am going to redo the stupid foundation you see in the next picture.  By the time I re-do the foundation the clean out will be right on the edge of the house.
This is the stupid foundation I was writing about above.  Whatever idiots made this foundation didn't even extend it below grade.  Furthermore; they put the sewer riser right inside the foundation.  There was about 3/4" of concrete I flaked away from the outside of the riser in order to tie in the new line.  When I re-do the foundation and extend the bathroom my riser will be on the inside of the foundation wall; like it is supposed to be.  I'm glad I caught this sewer line problem before the sewage started backing up inside the house!


05 May 2015

Houses I framed in Utah


Here are a couple of houses I framed in Utah in 2013.  They were right across the street from each other in the same subdivision.  They were out near the Copper Mine on the West Side of the Salt Lake Valley.  My crew and I framed these houses in less than 2 weeks each.  That was right before I quit the ill-compensated labor of residential framing and switched to teaching school.  I am still ill-compensated as a teacher but put in a lot less labor.  Now I have lots of time to remodel my own house.

28 April 2015


I have been excavating to expose my sewer line.  I am adding another bathroom in the house and I need to tie the bathroom drain lines into the sewer line.  I have plenty of free time and a scanty paycheck as a school teacher so I excavate by hand.  I am also putting in a new window in my foundation wall so I made my excavation wide enough to accommodate the form work for a concrete window well and footings.  The dilapidated porch and door to the right of the photo is coming out when I frame in my new bathroom
I formed the footings for my new window well.  You can see the foundation to the right of the photo hanging off in mid air.  This is due to the fact that the original foundation was poured without footings and not below the frost line-that is bad.  Previous owners have gone back and dug the basement out and poured concrete walls to contain the soil under the foundations.  I have added a block wall around the perimeter of the basement on the inside of the house as another line of defense against water entering the basement.  I am going to continue this chunk of missing foundation down to my footers- like it should have been done in the beginning.  I mixed all this concrete by hand because it is too expensive to call a concrete truck out here in the middle of no where, Colorado.  I mixed all this concrete (probably 2 cubic yards) by hand one Sunday.
I put tied re-bar to the re-bars sticking out of the footings.  Now all I have to do is build my form and pour the concrete for my window well.

I have the window well formed.  Now I am ready for concrete.  My neighbor let me use his concrete mixer so the 3 tons of concrete I mixed was manageable.  I hired a kid from one of my high school classes to come and mix the concrete while I poured it in the forms with a wheelbarrow.  We started mixing at about 1 pm.  We were almost done at about 8 pm and the FORMS STARTED BLOWING OUT!  I  had to pull them back together on top with bar clamps and put additional bracing on.  I didn't get to bed until 11 pm that night.  There will be some bow in the window well but most of it will be buried anyway.  I got lucky that all 3 tons of concrete didn't end up flooding my hole and burying my sewer line!  Next time I will have to brace the forms better.


I got the forms stripped.  Since I used OSB for the forms, the impressions of the wood flakes were left in my concrete walls.  Also, I laid up cinder blocks under the new concrete header to hold it in place.  I didn't like the look of cinder blocks next to poured concrete so I plastered everything.  I just used a mix of concrete sand, Portland cement, and masonry lime.  It worked really well and I am pleased with the new window. Now I have a source of daylight in my basement.  If the electricity goes out I can still have a little bit of light down there.  Now I can vent the basement whenever I want.  I also have another point of egress in case my house blows over with a tornado and we can't make it up the main stairs.  The only think I have left to do is back fill the window well, put in an egress ladder, and a metal grate where I left the indentation in the window well wall.  The nice thing about this project is that it has given me the confidence to form and pour an entire basement foundation on a new house if I ever build one.